Welcome to our comprehensive guide on lotion dispenser pump replacement. In this blog post, we will provide you with all the information you need to know about replacing lotion dispenser pumps. Whether you are a homeowner, a business owner, or simply someone who wants to learn more about this topic, this guide is for you. So, let’s dive in!
Understanding Lotion Dispenser Pumps:
1.1 What is a Lotion Dispenser Pump?
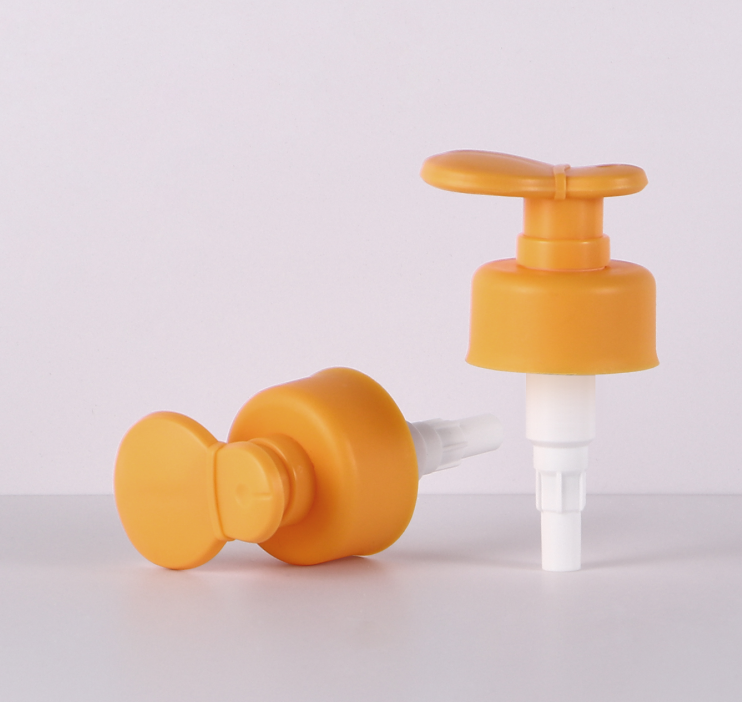
A lotion dispenser pump is a device that is used to dispense lotion or liquid products. It typically consists of a pump mechanism, a dip tube, and a closure. When the pump is pressed, it creates a vacuum that draws the lotion up through the dip tube and dispenses it.
1.2 Types of Lotion Dispenser Pumps:
Screw-on pumps: These pumps have threads on the bottom that allow them to be screwed onto the lotion bottle. They provide a secure and tight fit, preventing any leakage or accidental spills. Screw-on pumps are commonly used for thicker lotions or creams.
Snap-on pumps: These pumps have a snap-on mechanism that allows them to be easily attached to the lotion bottle. They provide a convenient and quick installation process. Snap-on pumps are commonly used for thinner lotions or liquids.
Lock-down pumps: These pumps have a locking mechanism that ensures the pump stays securely in place. They are designed to prevent accidental dispensing or leakage during transportation or storage. Lock-down pumps are commonly used for travel-sized or portable lotion bottles.
1.3 Common Issues with Lotion Dispenser Pumps:
Clogging: Over time, lotion dispenser pumps can become clogged due to residue buildup or dried lotion. This can result in a reduced or blocked flow of lotion. To prevent clogging, it is important to regularly clean the pump and bottle, especially if using thick or creamy lotions.
Leaking: Leaking can occur if the pump is not properly tightened or if there is damage to the pump or bottle. It can result in wasted product and a messy dispenser. To prevent leaking, ensure that the pump is securely attached and check for any cracks or damage in the pump or bottle.
Sticking or Jamming: Sometimes, lotion dispenser pumps can become stuck or jammed, making it difficult or impossible to dispense lotion. This can happen due to dried lotion or debris blocking the pump mechanism. To resolve this issue, try cleaning the pump and removing any obstructions. If the problem persists, it may be necessary to replace the pump.
When to Replace a Lotion Dispenser Pump?
2.1 Signs of a Faulty Lotion Dispenser Pump:
Difficulty in dispensing lotion: If you find it increasingly difficult to press down on the pump or if it requires excessive force to dispense lotion, it could be a sign of a faulty pump. This can happen due to wear and tear or internal damage to the pump mechanism.
Inconsistent flow: If the lotion dispenses unevenly or in spurts, it indicates an issue with the pump. This can be caused by clogging or blockage in the pump mechanism, preventing a smooth and consistent flow of lotion.
Complete failure to dispense: If the pump fails to dispense any lotion at all, even after multiple attempts, it is a clear indication that the pump is not functioning properly. This can be due to a malfunctioning pump mechanism or a blockage that is preventing the lotion from being drawn up through the dip tube.
2.2 Factors to Consider Before Replacing:
Age of the pump: Consider how long you have been using the lotion dispenser pump. If it is relatively new and still under warranty, you may be able to get it repaired or replaced by the manufacturer. However, if the pump is old and has been in use for a significant period, it may be more cost-effective to replace it.
Cost of replacement: Evaluate the cost of purchasing a new lotion dispenser pump compared to the cost of repairing the existing one. In some cases, it may be more economical to replace the pump, especially if the repair costs are high or if replacement parts are not readily available.
Availability of replacement parts: Check if replacement parts for your specific lotion dispenser pump are easily accessible. If the pump is from a lesser-known or discontinued brand, finding replacement parts may be challenging. In such cases, it may be more practical to replace the entire pump.
Tools and Materials Needed for Lotion Dispenser Pump Replacement:
3.1 Essential Tools:
To replace a lotion dispenser pump, you will need basic tools such as pliers, a screwdriver, and a wrench. These tools will help you remove the old pump and install the new one.
3.2 Required Materials:
In addition to tools, you will also need replacement lotion dispenser pump, a clean cloth or sponge, and a cleaning solution. These materials will ensure a successful replacement.
Step-by-Step Guide to Lotion Dispenser Pump Replacement:
4.1 Preparing for Lotion Dispenser Pump Replacement:
Before starting the replacement process, gather all the necessary tools and materials. Also, make sure to clean the area around the lotion bottle to prevent any contamination.
4.2 Removing the Old Pump:
Using the appropriate tools, carefully remove the old pump from the lotion bottle. Be cautious not to damage the bottle or any other components.
4.3 Cleaning and Preparing the Bottle:
Thoroughly clean the lotion bottle and remove any residue or debris. This will ensure proper functioning of the new pump.
4.4 Installing the New Pump:
Carefully insert the new pump into the lotion bottle, ensuring a secure fit. Follow the manufacturer’s instructions for proper installation.
4.5 Testing the New Pump:
After installing the new pump, test it by pressing down on the pump mechanism. Ensure that the lotion is dispensed smoothly and without any issues.
Tips and Tricks for a Successful Lotion Dispenser Pump Replacement:
5.1 Proper Maintenance of Lotion Dispenser Pumps:
Regularly cleaning and maintaining your lotion dispenser pump is essential to prevent clogging and other issues. Here are some steps you can take to ensure proper maintenance:
Disassemble the pump: Start by removing the pump from the lotion bottle. Most pumps can be easily unscrewed or pulled off.
Rinse the pump: Rinse the pump under warm water to remove any residue or leftover lotion. Use a small brush or toothbrush to scrub away any stubborn buildup.
Soak in soapy water: Fill a bowl or sink with warm water and add a few drops of mild soap. Place the pump in the soapy water and let it soak for a few minutes. This will help to further remove any dirt or debris.
Clean the pump mechanism: Use a cotton swab or toothpick to clean the small openings and crevices of the pump mechanism. This will ensure that all parts are free from any blockages.
Rinse and dry: Rinse the pump thoroughly under warm water to remove any soap residue. Shake off any excess water and allow the pump to air dry completely before reassembling.
Reassemble and test: Once the pump is dry, reattach it to the lotion bottle and test its functionality. Ensure that the pump dispenses lotion smoothly without any issues.
5.2 Troubleshooting Common Issues:
Despite proper maintenance, you may still encounter some issues with your lotion dispenser pump. Here are some common problems and their possible solutions:
Pump not dispensing lotion: This could be due to a clogged nozzle or a malfunctioning pump mechanism. Try cleaning the nozzle and pump as described in the maintenance section. If the issue persists, refer to the troubleshooting guide provided by the manufacturer for further assistance.
Pump leaking: A leaking pump could be caused by a loose or damaged seal. Check the seal and ensure it is properly tightened or replace it if necessary. If the issue continues, consult the manufacturer’s troubleshooting guide or contact their customer support for help.
Pump not priming: If the pump does not prime or dispense lotion after several pumps, it may be airlocked. Try removing the pump from the bottle, pressing it a few times to release any trapped air, and then reattaching it. If the problem persists, consult the manufacturer’s troubleshooting guide.
Pump becoming stiff or difficult to press: Over time, the pump mechanism may become stiff or difficult to press. This could be due to dried lotion or debris inside the pump. Clean the pump thoroughly as described in the maintenance section to resolve this issue.
5.3 Choosing the Right Replacement Pump:
When purchasing a replacement lotion dispenser pump, it is important to ensure compatibility with your lotion bottle. Here are some factors to consider:
Size: Measure the opening of your lotion bottle to determine the appropriate pump size. The pump should fit snugly without any gaps or leaks.
Closure type: Consider the closure type of your lotion bottle, such as screw-on or snap-on. Ensure that the replacement pump has a matching closure type for a secure fit.
Functionality: Determine the desired functionality of the pump, such as a lockable or adjustable pump. Choose a replacement pump that meets your specific needs.
Quality: Look for a replacement pump made from durable materials to ensure longevity and optimal performance.
Frequently Asked Questions (FAQs):
Q1: Can I replace a lotion dispenser pump myself?
- Yes, replacing a lotion dispenser pump is a relatively simple task that can be done by most individuals. Just make sure to follow the step-by-step guide and use the necessary tools.
Q2: How often should I replace a lotion dispenser pump?
- The lifespan of a lotion dispenser pump can vary depending on factors such as usage and maintenance. However, on average, it is recommended to replace the pump every 6-12 months.
Q3: Where can I purchase replacement lotion dispenser pumps?
- Replacement lotion dispenser pumps can be purchased from various sources, including online retailers, home improvement stores, and specialty cosmetic stores. Make sure to choose a reputable seller to ensure the quality of the pump.
Conclusion:
In conclusion, replacing a lotion dispenser pump is a simple process that can be done by following the step-by-step guide provided in this tutorial. By understanding the different types of pumps, signs of a faulty pump, and proper maintenance techniques, you can ensure the longevity and optimal performance of your lotion dispenser. So, go ahead and confidently replace your lotion dispenser pump with ease!